
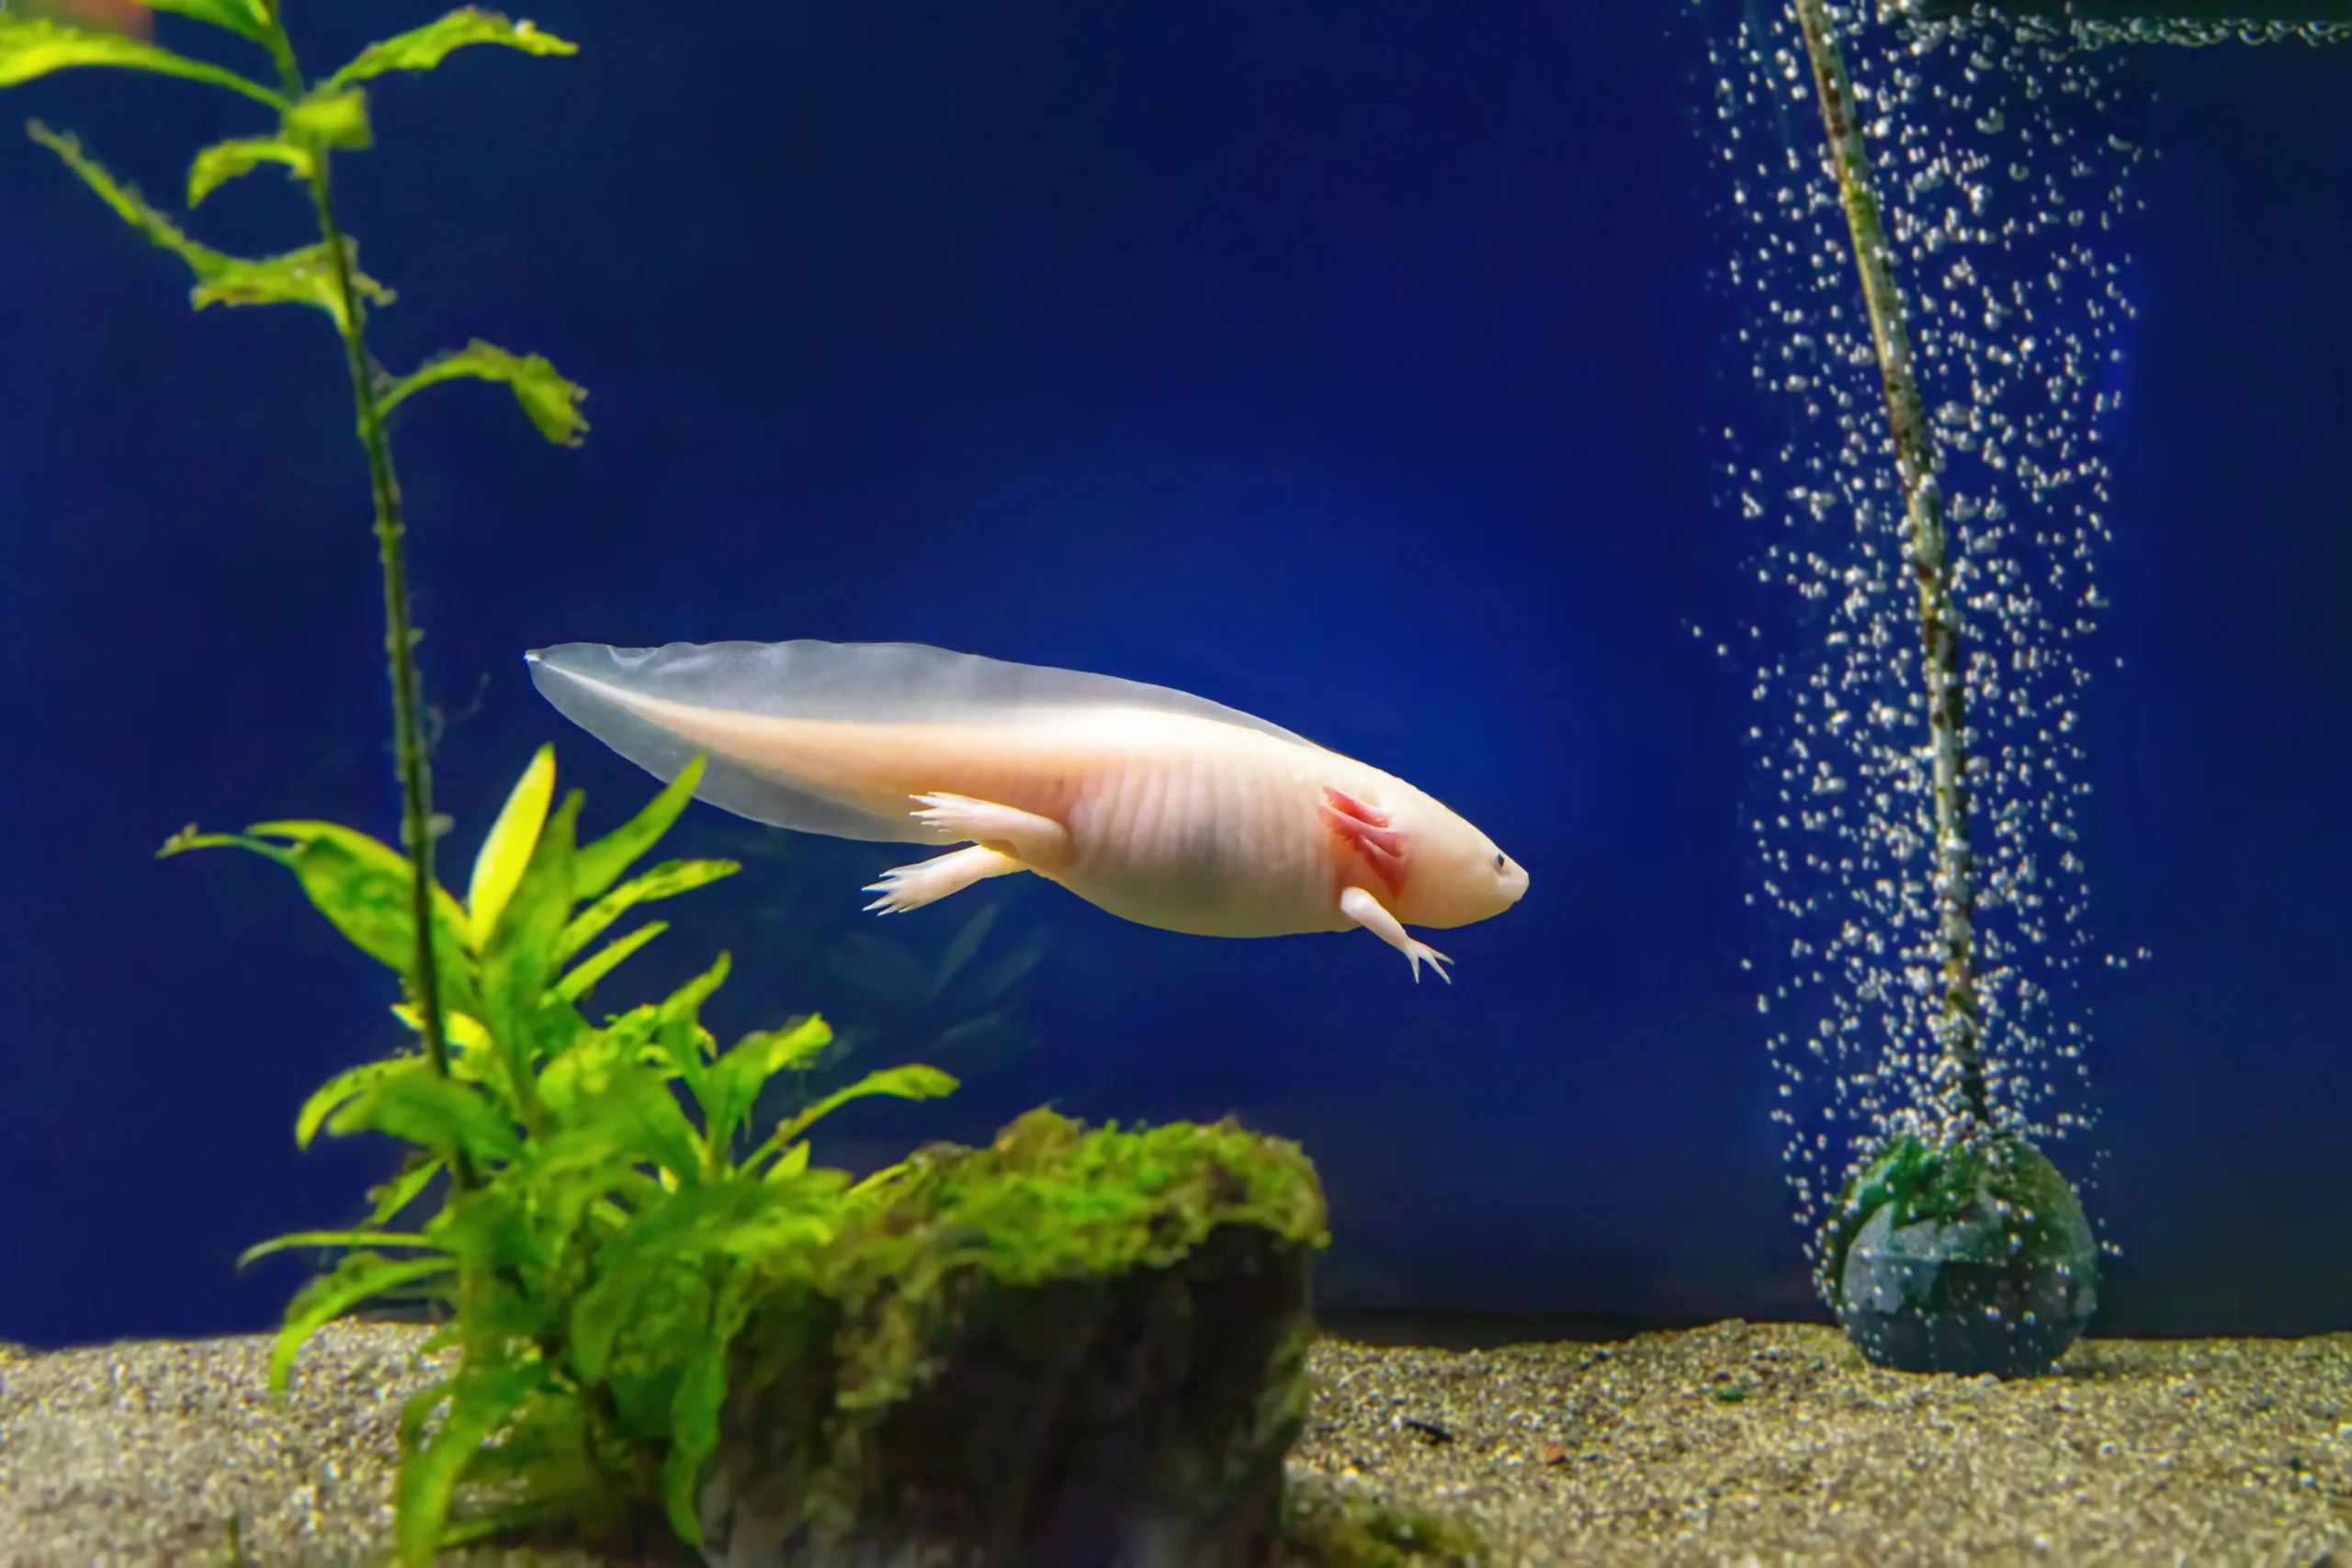
Have you got a new axolotl? Or planning to buy one? Tank cycling is something you must do before you invite your little gilled buddy into its new home.
It might sound like aquarium geek-speak, but is necessary for establishing a stable and healthy tank environment.
If you skip cycling or get it wrong, you could run into all kinds of frustrating (and dangerous) issues:
- Murky water that smells bad and looks even worse.
- Sudden spikes in ammonia or nitrites that can burn your axolotl’s gills.
- Worst of all, a sick or dying axolotl before you even get to enjoy having one.
To prevent these issues, you must keep water parameters in check.
Now, I know you might be overwhelmed by the number of instructions and advices people offer. I’ll try to simplify things for you and present them in a streamlined way here.
Let’s get started.
Table of Contents
Why Cycling Your Axolotl Tank is a Must
Consider a scenario of moving into a new apartment where everything is perfectly clean, but the plumbing is not connected. If you start using the washroom or doing dishes, where do you think all the waste goes? It’ll just accumulate and create a toxic, stingy environment for you. Similarly, a tank is a new apartment for an axolotl that needs cycling. Otherwise, the space is unlivable for them.
Axolotls produce waste (ammonia) through their gills. Without the beneficial bacteria that filter the tank, the ammonia level rises rapidly, resulting in stress, illness, and death of the axolotl.
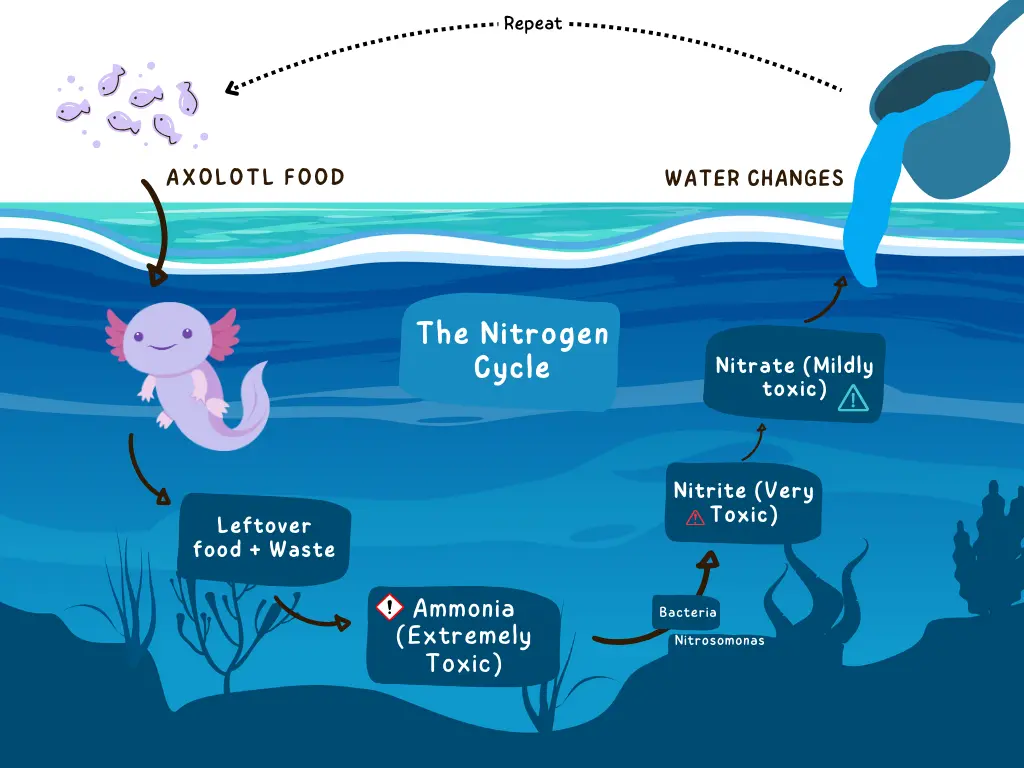
Cycling your water tank is the process of growing friendly bacteria so they can break down nitrogenous waste and keep the water healthy and safe for your pet. These eco-friendly bacteria eat the decaying organic waste and convert it into less toxic material to maintain the water quality, known as the nitrogen cycle.
The Nitrogen Cycle: What’s That?
The Nitrogen cycle (biogeochemical cycle) is a series of biological reactions where a nitrifying bacterium converts Ammonia into Nitrites and then into Nitrates. Here’s how it works, step by step:
1. Ammonia Formation
Animals produce ammonia (NH3) in the water through waste, decaying stuff, or uneaten food. Ammonia is very toxic for amphibians living in small, confined spaces (water tanks).
2. Nitrite Conversion
A type of bacteria called Nitrosomonas grows and eats the ammonia, and convert it into Nitrite (NO2-). However, nitrite is also deadly and toxic to axolotls.
3. Nitrate Conversion
Then, another type of bacteria called Nitrobacter (Nitrospira) shows up. It converts Nitrite into Nitrate, a much safer nitrogen compound. While nitrate is not directly toxic for the axolotl, too much of it can still cause algae and poor water quality.
This whole process is called the nitrogen cycle:
Ammonia → Nitrite → Nitrate
Once Nitrate is formed, the nitrogen cycle is complete, but it must be continued to establish a safe environment for the axolotl. To monitor nitrate in the water tank, you’ll need a good filtration system. The nitrogen cycle keeps the chemical balance in the water tank, but you still need to monitor the water and make adjustments regularly.
The 3 Types of Filtration
Filtration is the major process that keeps your pet alive in an aquarium. This filtration is categorized into three types:
- Mechanical Filtration is the basic stage of filtration that catches solid particles from the water, like uneaten food and pet excrement. You need to remove the junk before it converts into ammonia. Mechanical filters are in the form of sponges, foam, loosely bonded floss, filter socks, filter pads, and fleece rollers. These can be made of fine or coarse material, but they get clogged easily, so they need frequent cleaning and replacement. Some mechanical filters also consist of protein skimmers that remove hydrophilic waste through foam fractionation.
- Chemical Filtration removes dissolved particles that cannot be removed through mechanical filters. Chemical filter media are based on carbon, synthetic polymers, phosphate removal media, and granular ferric oxide (GFO). GFO only removes silicate and phosphate from the water, while carbon is a broader contaminant removal. Carbon-based chemical filtration improves the water quality in water tanks by getting rid of tannins, phenols, chlorine, odors or discoloration, and some other toxins. Synthetic polymers such as Purigen can efficiently work by removing organic waste.
- Biological Filtration is the third type of natural filtration process found in water systems. However, it was introduced in aquariums and water tanks to process and remove organic waste. The nitrogen cycle discussed earlier in this article is an example of biological filtration. The nitrifying bacteria live on all the surfaces of the tank, such as the wall, any submerged surface, and bio-media.
It should be noted that biological filters cannot remove waste from the water but convert toxic ammonia into less toxic nitrogenous compounds (Nitrates). Some bio media, such as live rocks, gravel or sand, and plastic bio-balls, increase the surface area for nitrifying bacteria.
Biomedia, bio pellets, carbon dosing, Zeovit, and Algae filters are some common biological filtration types that reduce phosphate and nitrate levels in aquariums.
Also Read: How to Care for Your Axolotl
Where Do the Good Bacteria Live?
Bacterial colonies do not freely float in the aquarium but stick to surfaces such as the tank wall, decorations, filter pump, and substrate.
The greater the surface area for the bacteria to colonize, the better it is for ammonia removal. For better growth of bacteria in freshwater tanks, you give them space with some of the following surfaces. These all can have tiny holes and provide an area so that bacteria can stick and grow.
- Sponge filters are cheap, easy to clean, and the most efficient filter. It collects debris and provides a surface for bacteria to grow.
- Ceramic rings are specifically designed to support bacterial colonies. A very thin, translucent, and slimy layer forms on ceramic rings.
- Bio balls are small balls made of plastic that provide a lot of surface area for beneficial bacteria to grow.
- Substrates or decorations such as sand, gravel, and live rocks are the best places for beneficial bacteria to grow. Additionally, non-porous decor items, such as sand, provide a large surface area for bacteria.
What Happens During Cycling?
Stage 1: Ammonia Spike
When you first set up your tank and add a source of waste (like pure ammonia or fish food), ammonia levels rise. Ammonia is highly toxic to axolotls. Even small amounts can damage their gills and stress them out.
Stage 2: Nitrite Appears
Good bacteria called Nitrosomonas begin to grow. They “eat” ammonia and convert it into nitrite, which is also toxic to your axolotl. You’ll usually see a drop in ammonia and a spike in nitrite during this phase.
Stage 3: Nitrate Forms
A second type of bacteria, Nitrobacter, starts to develop. These guys turn nitrite into nitrate, which is much less harmful in low amounts.
Final Result: Nitrate Builds Up
As the cycle completes, ammonia and nitrite drop to zero. Nitrate goes up, and algae growth may occur, which is totally normal.
This stage shows that the Nitrogen cycle in your tank is well established, and bacteria are working properly to remove ammonia and nitrates.
This whole process usually takes 3–6 weeks. But this does not mean your aquarium is safe for the pet. A true cycle means no end product is formed, but continuous recycling of ammonia. Accumulation of nitrate in the aquarium results in serious issues such as exophthalmia (bulging eyes) and corneal opacity. For this reason, monitoring the water quality and regular water changes should be done as required.
How Do You Know It’s Ready?
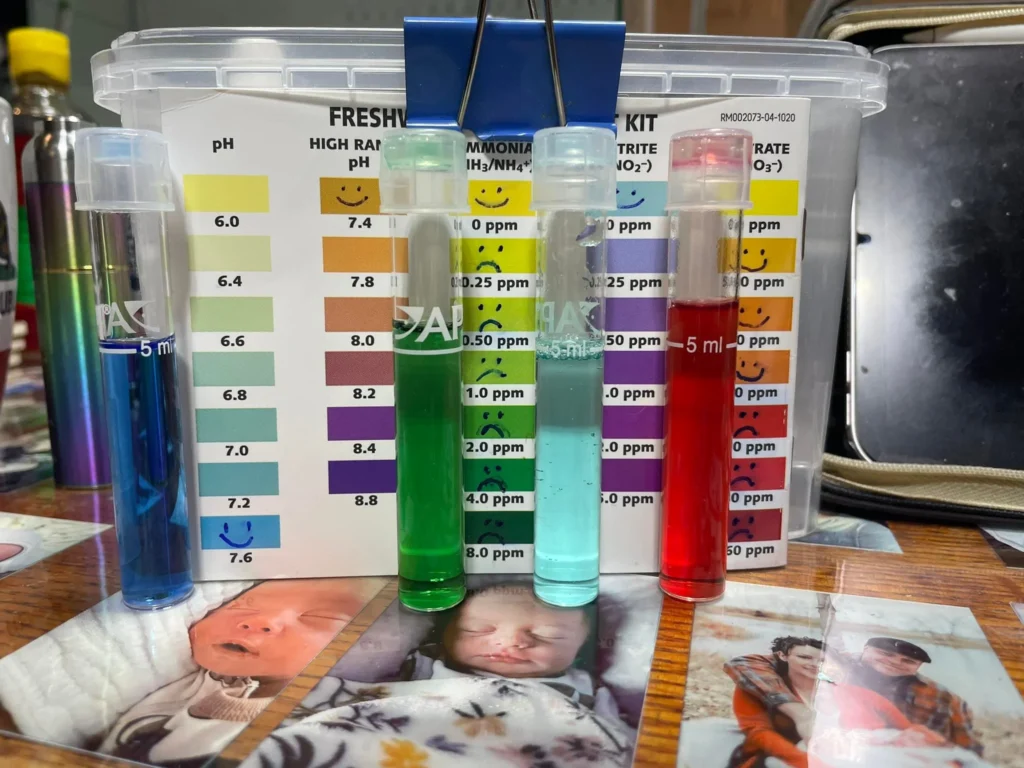
As I discussed earlier, nitrate presence in the water tank means the cycling has started. However, it is recommended to test the water before putting your axolotl in it. The whole cycling process is invisible. To know what is happening inside the water tank, you need a test kit (like the API Freshwater Master Kit).
- You must test the water regularly after putting in the ammonia.
- Once you see ammonia = 0 and nitrite = 0, but nitrates are present, your tank is cycled! The bacteria are doing their work properly.
- Now it’s safe to add your pet axolotl to the water after some water changes.
Also, remember that you can’t cycle a tank with axolotls or any fish in it. Ammonia and Nitrite Spikes are Lethal for axolotls: Tub them separately and change water daily while the tank is cycling.
How to Cycle Your Aquarium?
Now that you know about the nitrogen cycle and its importance, it’s time to do it for your axolotl. The process is very simple, and first, collect some basic supplies given below:
Supplies to Buy
Empty Water tank
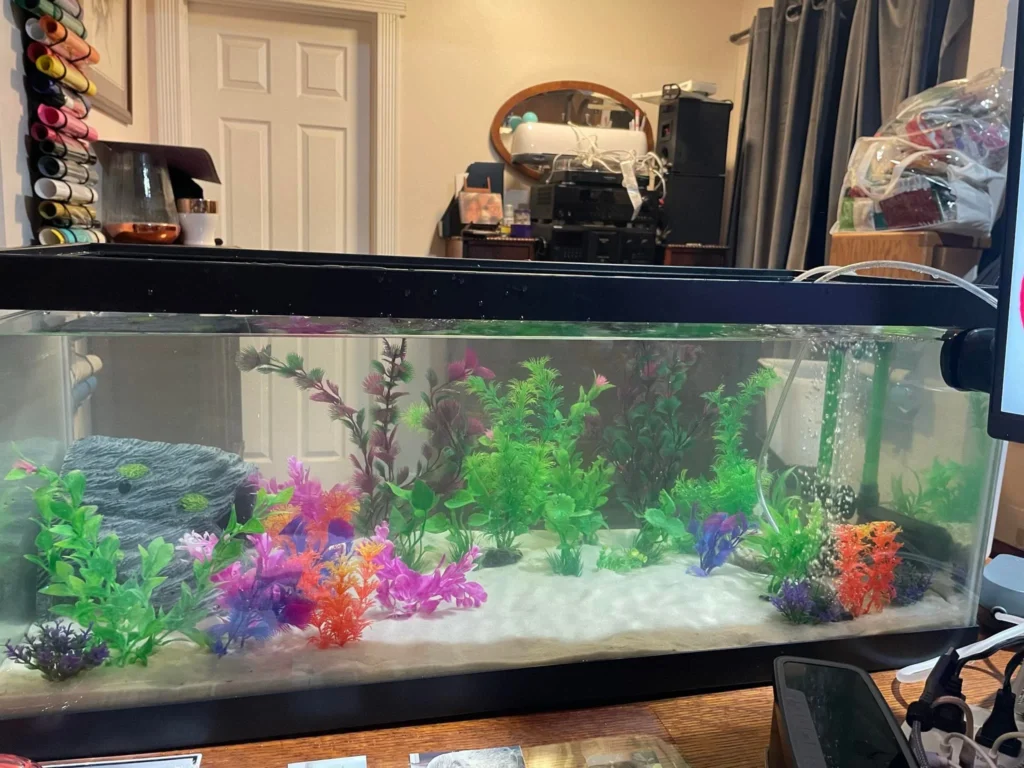
A 22-gallon tank (by Tetra Store) is recommended for juvenile and subadult axolotls. However, a bigger tank offers a free-moving space for mature axolotls. Ensure the tank has a lid to keep the axolotl from jumping out.
While establishing a Nitrogen cycle in the water tank, do not put your pet axolotl in it. In an empty tank, ammonia and nitrite levels can easily be monitored, and bacterial colonies will be established efficiently. Initially, ammonia and nitrite spikes are high in the tank, which can be fatal for axolotl. Empty tanks will prevent all of these risks for axolotl.
Dr. Tim’s Ammonia

Bacteria need a constant supply of ammonia to start the cycle. It is impossible to establish a Nitrogen cycle without an ammonia supply. You can use shrimp or fish food, but it does not offer a precise or controllable dose, and also causes cloudiness in the tank.
Dechlorinator

Avoid tap water for cycling, as it contains chlorine and chloramine, which are harmful to axolotl and nitrifying bacteria. A de-chlorinator is required every time you add water to the tank. My go-to product, which I love, is Seachem Prime. It is a great value for the money, easy to use, and works fast. It also contains chelating agents to detoxify heavy metals.
Bottled Bacteria

Good-quality bottled bacteria (live bacteria cultures) are essential to establish and boost the Nitrogen cycle in the tank. I have two recommendations for bottled bacteria: Seachem Stability or Fritz Zyme 7. You can use some other brands, too. It is completely your choice, but both of these are great in terms of potency, stability, and safety for axolotl.
API Freshwater Master Test Kit

A reliable test helps to track your cycle and maintain the water quality. The API freshwater master test is more accurate than traditional paper strips. Moreover, it offers 800 tests per kit for ammonia, nitrite, nitrate, and ph levels.
Sponge filter
A used filter sponge or filter floss has already established bacterial colonies. Therefore, it can speed up the cycling process. You can try getting it from any local fish store. I use Hygger double sponge filter.
- A Chiller (with a backup pump) is required to keep the water cool all the time for the axolotl. However, to nitrify bacteria, don’t keep the water too cold in start. I use the one by BAOSHISHAN.
- Airstones: Airstones like Upettools with an air pump and valve help to aerate the water and increase the oxygen level.
- Hiding spots, such as tunnels, caves, or decorations, provide a large surface area for bacteria to colonize. Biofilm will form on these surfaces and be beneficial for cycling.
Plants
Aquatic live plants consume nitrogen waste more effectively than bacteria. Leaves and roots of plants contribute to some beneficial bacterial growth.
- Turkey baster (skinny + large) is used to clean the waste manually.
- Long tweezers for feeding/maintenance.
- Substrate: Avoid using gravel or coarse sand as a substrate. Opt for fine sand (like by CaribSea SuperNatural), fixed tiles, or rocks. And bare bottom for juvenile axolotls.
Additionally, I keep a testing diary to track water parameters during the cycle to identify trends.
Also read the ultimate list for supplies you’ll need for your axolotl.
What NOT to Do
- Don’t use distilled water as it lacks certain minerals and salts necessary for axolotl.
- Don’t blindly trust all breeders or pet shops, as the majority of them give poor advice for quick sales and their benefit. Always do your research.
- Don’t expect the bottled bacteria to be a magical ingredient, and expect a full cycle in just 2 days. It’s a supplement that needs time to work.
- Don’t practice cycling with live fish/pets (they can be stressed, suffer, and die due to ammonia and nitrite spikes).
Steps to Cycle Your Aquarium
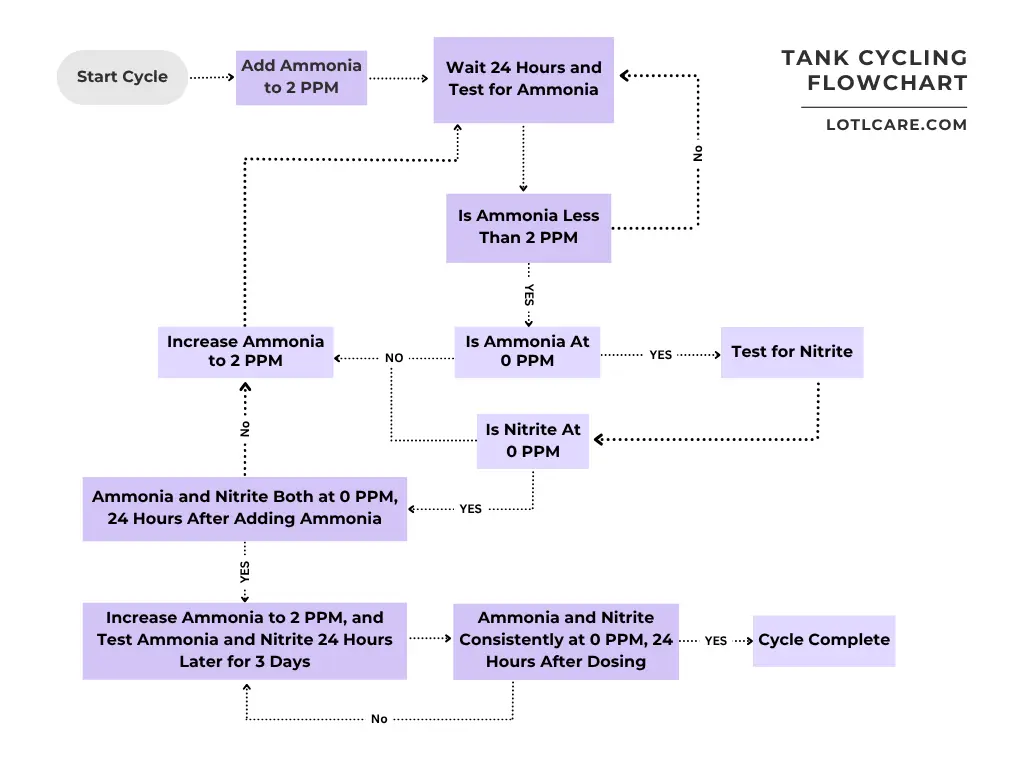
Here’s a flowchart to follow if you get stuck with parameters:
Step 1: Set Up Your Axolotl Tank Environment
The tank’s placement matters for both axolotl health and the establishment of the Nitrogen cycle. Choose a location away from direct sunlight, high traffic, vibration, and extreme heating or cooling systems. Additionally, consider a table or stand with a level surface for the tank’s safety.
Set up the aquarium with a filter, decorations, substrate, and live plants as per your aesthetics. Place the thermometer in a visible location where it’s easy to read. Bacteria prefer temperatures between 65-85°F. Colder temperatures slow their growth cycle and activity. Don’t run your chiller during cycling. Install your chosen filter and other equipment to ensure optimal water circulation in the tank.
Avoid using any substrate or decorations that are small enough to be ingested by axolotls. Moreover, ensure that all these items are aquarium-safe and have a smooth surface. I recommend rinsing the substrate thoroughly before adding it to the tank. All the submerged equipment inside the tank will help colonise the bacteria, so pay close attention to the details.
Step 2: Fill the Tank with Water and Add Water Conditioner
Fill the tank with water gradually, avoiding disturbing the substrate. Tap water is acceptable if treated with a water conditioner. Avoid using distilled water. Use Seachem Prime as per the manufacturer’s instructions to remove chlorine and chloramines. Avoid filling the tank to the top, as there should be enough space at the top for water displacement and splashing.
Keep the pH level right, as Ammonia toxicity and concentration increase as pH increases. The optimal pH is 7.2-8. A low pH can kill the nitrifying bacteria. Regularly monitor the pH and make adjustments as needed. Low pH can be increased by adding coral, household ammonia, or limestones due to their basic pH nature.

Step 3: Introduce Ammonia to Start the Cycle
Normally, axolotl/fish produce wastes that provide food for bacteria. But in a controlled captive environment, you need an ammonia supply to start the Nitrogen Cycle. This ammonia is the food source for the Nitrosomonas bacteria. It’s better to start with a low dose of ammonia to prevent sudden spikes of nitrite.
Add two-three drops per gallon of Dr. Tim’s Ammonium Chloride to the water tank. (1 drop usually accounts for 1 ppm). Check the aquarium ammonium parameter 1 hour later to ensure the correct dosage of ammonium. An alternate option is to add a small piece of uncooked and unseasoned shrimp or a pinch of fish food in the water tank and wait for it to rot. After that ammonia will be released but it’s a less accurate method.
Now monitor the ammonia level daily for one week by using the liquid test kit.
Step 4: Add Beneficial Bacteria
Ammonia can build up at high levels if the colony of beneficial bacteria is not present. Nitrosomonas and Nitrobacter are present in very small numbers in the aquarium, and they need an oxygen supply. Some users completely skip this step and let nature take over, but I prefer to add Seachem Stability to speed up the cycling process. This is cultured live bacteria. You do not need to add it daily. Always follow the manufacturer’s guidelines before using it. Also, avoid using bacterial balls in the axolotl water tank.
The main goal of using these bacteria is to convert ammonia into nitrites and then into nitrates. Use a liquid test kit 2-3 times per week to measure ammonia, nitrite, and nitrate levels.
Now when your ammonia is at 2 PPM, and you add Seachem Stability, test the nitrites. The goal is to see a spike in ammonia followed by a rise in nitrites, and eventually, the conversion to nitrates. Then use test kit to monitor these levels.
Step 5: Monitor Water Parameters and Partial Water Changes
Monitoring is quite tricky because you might not observe any progress for a couple of weeks. However, as the process is invisible, you can understand the cycling stages through parameter readings. Also, test for other parameters like pH.
Frequent testing is required for a better understanding. Initially, test twice a week. After that, test every 1-2 days and make changes as required.
Initial Ammonia Spikes
If you skip monitoring and testing and the ammonia level drops to 0 ppm without the presence of nitrite and nitrates, all the beneficial bacteria will die, and the progress made until then will be lost.
It is normal to observe fluctuations in ammonia levels. Once the Nitrogen cycle begins, the ammonia level will decrease continuously. For the initial days, whenever the ammonia level drops by 1 ppm, add some more. Ammonia levels should be maintained between 2-4 ppm for effective conversion into nitrite. Add more food or ammonia if the level is less than 2 ppm. Likewise, change 10-20 % of tank water if levels rise more than 5 ppm. While less than 2 ppm cannot produce enough nitrite, excessive doses can be harmful to bacteria.
Nitrite Concentration
If you observe a nitrite spike to 5 ppm, stop dosing extra ammonia. Bacteria cannot consume nitrite as fast as they consume ammonia. Therefore, if less amount of ammonia is present then less amount of it is converted into nitrite. Likewise when you observe less nitrite then add some ammonia.
You will notice a spike in nitrites, and then they will go to zero. Once the ammonia level is stable and the nitrite concentration reaches 0 ppm, your tank is almost cycled. It’s time to move on to the next step.
Nitrate Test
Monitor the nitrate presence in the tank. It should be between 5-15 ppm. Nitrobacter will convert the nitrites into nitrates. The goal is to keep both Nitrosomonas and Nitrobacter while maintaining nitrates in the tank. Nitrate’s presence is an indication that cycling is almost complete. At the last stage, ammonia and nitrite reach 0 ppm while there is a suitable amount of nitrate This means the tank is fully cycled and bacteria are now doing their job well.
A true cycled tank means 2 ppm ammonia is converted into 0 ppm ammonia, and then 0 ppm nitrite within 24 hours.
Target Parameter Ranges for a Cycled Axolotl Tank:
- Ammonia: 0 ppm
- Nitrite: 0 ppm
- Nitrate: Below 20 ppm
- pH: 7-8
Ammonia is consumed by bacteria and converted into nitrites, nitrite is also consumed by bacteria and eventually converted into nitrates. However, nitrate is only removed by partial water changes or consumed by plants. Nitrates are acidic, and high concentrations in the tank can lower the pH of the water, which can stall the Nitrogen cycle. Partial water changes (dechlorinated, 50 % temperature matched) are recommended if nitrate levels exceed 20 ppm.
Step 6: Confirm Cycle Completion:
Before you add your axolotl to the tank, ensure the cycling is complete. This is an additional step to prevent future mishaps.
The 24-Hour Ammonia Clearance Test:
For this, you should add 2 ppm of ammonia in the tank and check if the water has 0 ppm ammonia, 0 ppm nitrite, and nitrates (5-20 ppm) after 24 hours. If they are, repeat the process for the next two days. If the results are stable, it means that the tank is safe for the axolotl. Furthermore, algae growth in the tank is also a good indicator to add an axolotl to the water. This confirms that beneficial bacterial colonies are established enough to process the waste effectively.
Pre-Stock Prep:
- Now that the Nitrogen cycle is complete, you must do a 50% water change (25% if >75 gal) and wait for 24 hours. The nitrate level should be between 5-20 ppm. Redose Stability after water change.
- Turn on the chiller so that the temperature gets optimal before putting in the axolotl.
- The frequency and schedule of water changes depend on the bioload in the water tank. Start with a 10% water change weekly and test nitrates 24 hours later. After a month, you can adjust the frequency to keep the nitrate level less than 20 ppm.
Step 7: Introduce Your Axolotl
After the final water change, and fixing your nitrate level to less than 20 PPM, you can safely introduce the axolotl into the water. Once the axolotl is in the new home, continue with regular maintenance such as performing routine water changes, cleaning the filter occasionally, and monitoring water parameters, i.e., temperature, and ph to ensure a healthy and safe environment for the axolotl.
Keep a close eye on your axolotl for the first few days and check for any signs of stress. Initially, offer a small amount of food to ensure they are adapting well. Avoid overfeeding or frequently feeding the axolotls as the tank’s biological filter adjusts to their bioload.
Understanding Key Water Parameters for a Healthy Axolotl Environment
| What it is | Why it’s Harmful | Target Level in Cycled Tank | Target Level During Cycling | |
| Ammonia (NH3/NH4+) | A natural byproduct of the decomposition of axolotl/fish waste, uneaten food, and dead algae | Highly toxic for amphibians, burns gills and skin, damages organs, and causes stress and death | 0 ppm (trace amounts can be harmful) | Initially required in an empty tank to start the Nitrogen cycle, then decreases by 0 ppm as bacteria colonise. |
| Nitrite (NO2-) | A temporary/ intermediate product converted from ammonia by Nitrosomonas bacteria | Highly toxic for axolotl as it hinders the blood’s ability to carry oxygen and causes suffocation. | 0 ppm (even trace amounts are harmful) | Sudden spike after ammonia drops, as the cycle progresses, its concentration should be 0 ppm |
| Nitrate (NO3-) | The final product of the Nitrogen cycle is converted from nitrite by Nitrobacter bacteria. | It is relatively less toxic than nitrate and nitrite, but high levels can stress the axolotls and contribute to algae growth. | 5-20 ppm (can be managed by regular water changes) | Spike as nitrite decreases, which indicates the cycle is almost complete. |
| pH | The measure of how alkaline or acidic the water is | pH should be the same throughout the cycle. Extreme pH can stress axolotl. Ammonia concentration increases with pH. | 7-8 (slightly acidic to slightly alkaline is recommended) | Slight fluctuations are normal as it stabilizes when the cycle is established. |
Additional Tips
Here are some tips that’ll help you during the cycling of your tank.
- Patience is the Key: Whenever you think, “Why are the results not as I want?” Why is the cycle not completed? “What am I missing in the process?” You are probably lacking patience. Remember, the nitrogen cycle is a natural process that takes 4-8 weeks to establish. Overthinking and rushing the process won’t cut it. Regular testing and consistent monitoring are important for a well-established cycle.
- Supplements: Although it’s better to let nature take over, if you are impatient, then try some bacterial supplements or go to your nearby fish store and ask for seeded media. This media has established colonized beneficial bacteria that will fasten the cycling process.
- Fishless cycling is kinder to Axolotls: Always cycle the tank before introducing the axolotl, and opt for fishless cycling. Fish-in cycling is stressful, harmful to poor fish, and may harm the axolotl as you might not know if the fish is carrying some disease. Moreover, it is not a controlled situation and does not have consistent results.
- Regular water testing: Track the progress of the Nitrogen cycle because once the ammonia levels go to 0 ppm without the presence of nitrite, you have to start over the whole process again.
- Avoid frequent water changes: Initially, frequent water changes can disrupt bacterial colonisation. Moreover, do not fully drain, scrub, or deep clean the tank to preserve established bacteria. I advise you to do multiple 20-25% water changes after a few days.
- Live plants: Bacteria can consume ammonia and nitrites but not nitrates. Therefore, live plants are best left in the aquarium, as they absorb them. This will eventually aid in cycling the tank.
- Filter Maintenance: Avoid replacing or rinsing the filter media during cycling. If you wash it in the future, rinse it to remove debris, but never replace the media all at once, as bacterial colonies are established on it. Additionally, never use tap water to rinse.
FAQs
How Do You Deal With Algal Blooms While Cycling A Tank?
Algal blooms are common and build up due to nutrient deposition (nitrates) and light exposure. To avoid nitrate buildup, partial water changes can be performed. Additionally, adjusting the light frequency and duration in the aquarium will help.
What Should Be Done With Ammonia Spikes After The Cycle Appears Complete?
A sudden ammonia spike after the cycle appears complete means there is something wrong with the bioload. Know the root cause and stop dosing ammonia in the tank. Avoid overfeeding, perform partial water changes (25-50%), and test regularly to keep a record of the situation. Another factor that may cause ammonia to spike is pH. Check the pH; as it increases, it will also cause ammonia levels to rise.
How Do I Know If My Tank Is Fully Cycled?
The best indicator that your tank is fully cycled is to perform a 24-hour ammonia clearance test. Dose 2 ppm of ammonia in the water tank, and wait for 24 hours. Test if the ammonia and nitrite level decreases to 0 ppm along with nitrate levels of 5-20 ppm. If yes, then repeat the process for the next two days. If the results are constant then congratulations, your tank is fully cycled.
How To Speed Up Tank Cycling?
The best tip to speed up the cycling process is to use old filter media. It can be obtained through your friend who has an axolotl/fish, or you can purchase it from the local fish store. If the media is previously being used, it has a good amount of beneficial live bacteria. These bacteria can speed up the nitrogen cycle when introduced into a new water tank.
Also Read:
The Axolotl Diaries
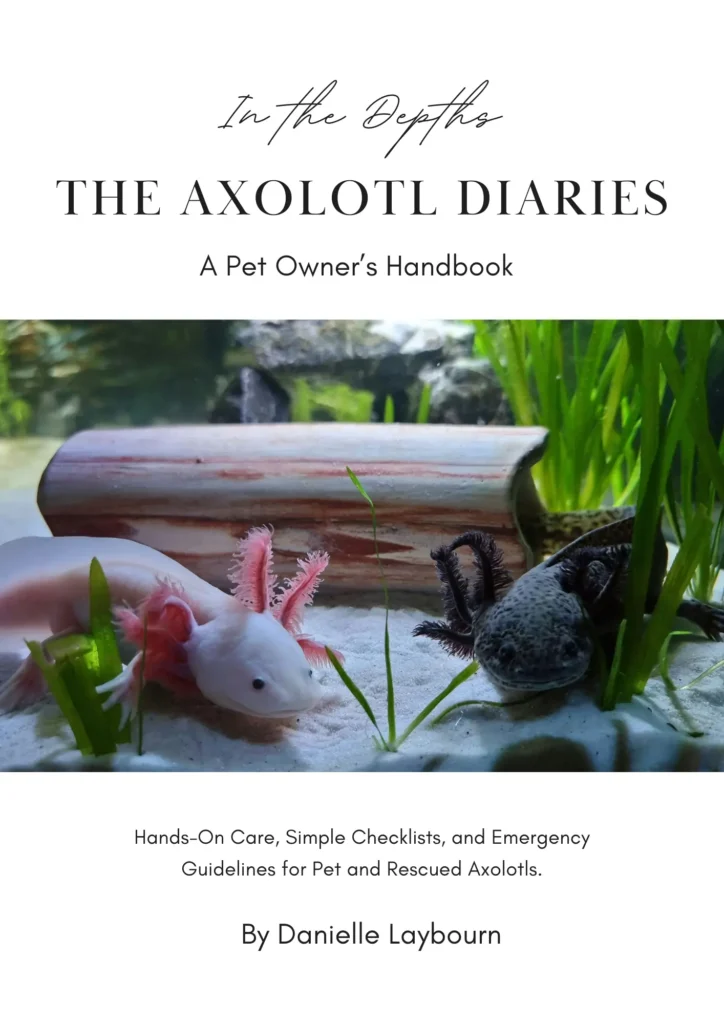
A clear, step-by-step handbook (50+ pages) about axolotl care that covers basics, safe tank requirements, cycling, feeding, common health issues, and more.
Rescue-informed and vet-aware. For anyone who wants to raise a healthy, happy axolotl.
Find everything in plain language, backed by real experience.
Grab printable cheatsheets, practical tips, and easy troubleshooting guide inside!
Price: $14.99
Conclusion
Welcoming your axolotl into a newly cycled tank is as rewarding as getting a new home for yourself. Although the whole process is time-consuming, I hope you bear with it. I know the process sounds complicated, and it is easy to feel lost. But stick to it, ask for support, and keep going.
Remember:
- Take it slow. Cycling takes time (usually 4–6 weeks).
- Test your water regularly.
- Never add your axolotl until ammonia and nitrite are zero, and nitrates are at safe levels.
Think of cycling as the foundation of your axolotl’s home. Get it right, and you’ll enjoy a happy, thriving aquatic buddy for years to come.
Got questions or need help troubleshooting your tank cycle? Drop them in the comments. I’d love to help!
Disclosure: This post contains affiliate links. As an Amazon Associate, I earn from qualifying purchases. It means that if you click on an Amazon link on this site and make a purchase, I may earn a small commission at no extra cost to you. Thank you for your support!