
Looking for a natural, nutritious, and sustainable way to feed your axolotls? You can set up a worm bin that can provide a constant supply of live, healthy worms.
They are perfect for your axolotl’s dietary needs, and a simple and eco-friendly way to recycle food scraps.
Let’s explore vermicomposting and how you can set up a worm farm for your axolotls.
Table of Contents
Why Worms are Ideal for Axolotls
The ideal axolotl food is high in protein and low in fat. In the wild, axolotls are carnivorous and feed on a variety of live food such as small fish, crustaceans, and worms.
In captivity, the pet axolotls prefer worms, which are balanced food in terms of nutritional value. Worms provide a stable amount of calcium, phosphorus, and appropriate fat content to axolotls. The wriggling movement of worms also triggers and stimulates the predatory instincts of axolotls.
Worms are a complete meal, rich in nutrients and protein for axolotl’s healthy growth and development. Proteins are a must for repairing tissues and supporting growth. Calcium is crucial for bone development.
Also, axolotl teeth are not designed for tearing or chewing food, and they swallow food whole. Worms are easy to swallow, digest, and are nutrient-dense, too.
Any type of worm can be fed to axolotls as long as they are pest and disease-free. There are about six varieties of worms you can feed to axolotls (from the Lumbricidae family). Earthworms are the best though.
- Lumbricus terrestris, commonly known as tiger worms, bait worms, fishing worms, and Canadian crawlers. Worms of this group are reddish cream in colour and 10-25 cm in length.
- Aporrectodea caliginosa/ Allolobophora chlorotica, known as the field worm, grey worm, or British worm. These are 4-10 cm in length and pale grayish-pink in color.
- Eisenia hortensis, commonly known as European Nightcrawler, Dendrobaena veneta, Dendrobaena hortensis, Dendra. These worms are 12-20 cm in length and brown-red in colour.
- Eisenia fetida, commonly known as Red wriggler, compost worm, banded worm, manure worm, trout worm, brandling worm. Eisenia fetida has a deep rust colour and ranges from 5-7 cm in length.
Blackworms, also known as Pheretima posthumosa, are humus feeders rather than humus formers, which is essential for vermicompost. Therefore, these are not recommended for vermicomposting.

Best Worm Types for Your Bin
A vermicomposter is a worm composter bin that increases the rate of decomposition in a compost bin. The prefix “vermi” literally means worms. Worm bins have holes for ventilation and moisture.
Vermicomposter containers are easily available, or you can make one on your own. The purpose of vermicompost is to turn organic food waste into nutrient-rich soil. The benefits are not limited to:
- Sustainable way to compost food waste.
- Axolotl can enjoy home-grown, healthy, and pest-free meals.
- The worm casting/vermicasting, is known as black gold. It is one of the best natural fertilizers for plants.
- These are super easy to maintain and inexpensive.
Before setting up your vermicomposter, there are a few considerations that should be kept in mind.
- The container should be functional for worms. It should be easy to open and close. The type of worms that you use in the vermicomposter matters because not all worms are suitable for bins.
- Do not collect any random worms that you find in the garden. Purchase them from a professional worm grower.
- Also, remember worms can eat about 50% of their body weight daily. If you put too much food waste in the composter, it will start to smell bad. So make sure you put the right amount of food waste to prevent foul odor.
1. Red Wigglers (Eisenia fetida)
The type of worms that you should use for worm bins are Red Wigglers. Eisenia fetida are well adapted to thrive in compost conditions. These worms prefer to live on rotten vegetation, compost, and manure. Red wigglers are epigean, meaning they are surface-dwelling worms that live and feed on the surface of organic material.
- Rapid reproduction rate
- Voracious Eaters (compost variety of waste)
- Adaptable to conditions such as temperature and humidity
- Under stress conditions, they produce defence slime, which tastes bitter
- Can’t tolerate dry conditions.
2. European Nightcrawlers (Eisenia hortensis)
European Nightcrawlers are also a popular choice for composting. They are larger in size and suitable for adult axolotls. Eisenia hortensis can thrive in both indoor and outdoor worm bins. Their ability to consume a variety of waste compared to Red wigglers makes them ideal for vermicomposting.
- Versatile feeders: from food scraps to yard waste, they efficiently consume a variety of organic matter
- Known for hardiness and tolerance of temperature
- Suitable for deeper and larger vermicomposting systems
- Slow reproduction rate
- Tend to dig deeper compost bins
- Large size makes them less ideal for smaller vermicomposting systems
Material and Tools Checklist for DIY Worm Bin
Indoor worm bins are best for people who have small spaces. You can place it in the kitchen or laundry room. These are easy to maintain because bins are not exposed to the external environment.
But if you have some extra space, like a garage, a backyard, you should go for outdoor vermicomposting bins. They are high maintenance and more prone to worm dying due to temperature and humidity fluctuations.
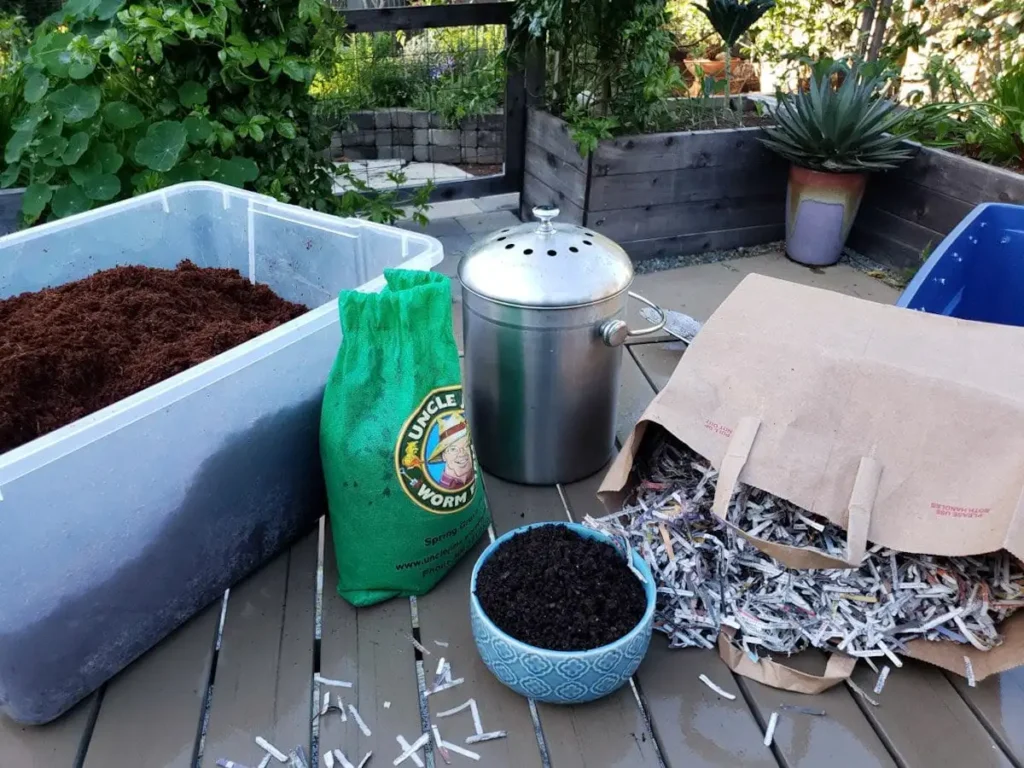
Here is the list of the supplies you’ll need to start your own DIY vermicomposting bin:
- Storage bin or worm farm container (opaque, with a lid)
- Power Drill or something to poke ventilation holes
- Bedding Material:
- Shredded newspaper or cardboard
- Coconut coir or leaves (optional)
- A bit of garden soil (no pesticides)
- Food scraps (no meat, dairy, or citrus)
- Spray bottle for moisture
- Worms
Vermihut Worm Composter
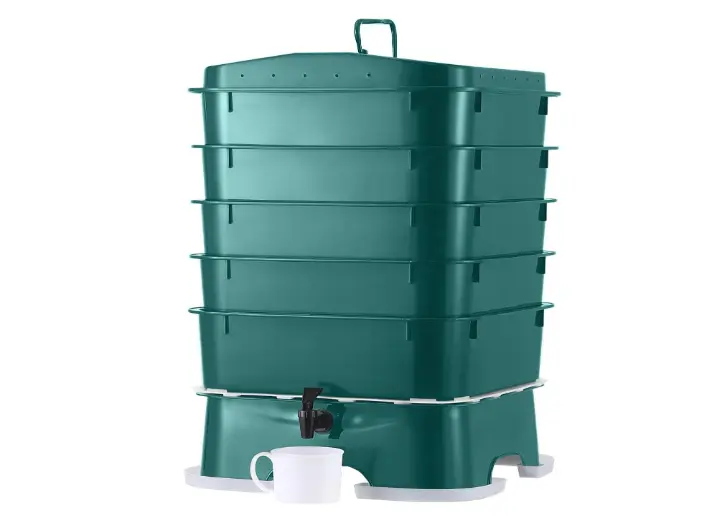
You can reuse any plastic container in your house. But if you are more into aesthetics and don’t like dull colored buckets, then I recommend you invest in a Vermihut Worm composter. The product is an excellent value for what you spend.
The design is excellent with standard five trays, and extra trays can be added. There is a built-in worm-saving tray to increase the airflow and improve compost efficiency. Also, the lid is designed to control moisture, reduce odor, and prevent fruit flies or other pests.
It comes with some accessories such as a liquid collection cup, coconut coir, a scrapper, and a piece of claw. It’s easy to maintain, too.
Step-by-Step Worm Bin Setup
Step 1: Prepare the Worm Bin Container
You can use a commercially available worm tower system or take any durable plastic or wooden containers or tubs. Storage totes are also great for this purpose.
Choose a darker container because worms are photophobic. They will stay away from sides that are transparent or bright.
Also, get the right size of the container. Red wigglers are surface dwellers, and they prefer broad but shallow containers.
Clean the bin with mild soap and water if it’s new or used. Rinse thoroughly and wipe the bin to remove any chemicals that may be harmful to worms.
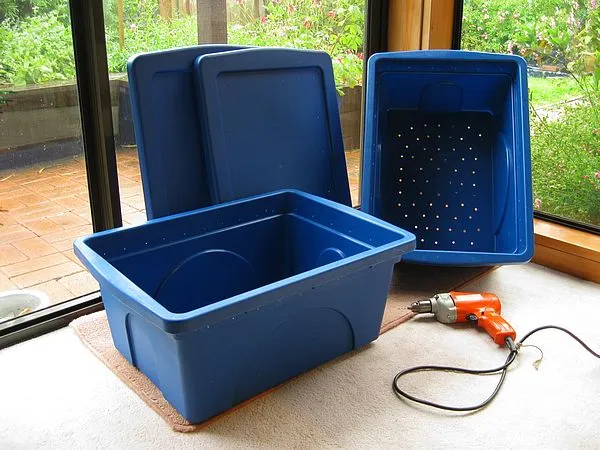
Now for DIY, you have two options:
- First is to use two containers. A smaller one resting inside the taller one to form a tray system. The top bin is where you put food scraps and worm bedding. The bottom bin will help to scoop out extra liquid and maintain the moisture level in the worm bin.
- The second option is to use only one container, but ensure that it is placed on top of bricks or wood. It will help to remove excess liquid from the composter without making the worms too wet.
Choose the size between 15 gallons to 35 gallons as per your ease. A rough measurement of an 18-gallon tub/bin is 15 inches in depth, 20 inches in width, and 15 inches in height. The top bin/tub must have a lid to prevent worms from escaping.
Get a power drill to make 3/16 inch diameter holes one inch apart in the bottom of the tub. It will allow excess liquid to drain out of the bin so that worms don’t drown.
Make ⅛ inch diameter holes on the top of the bin as well as on the sides of the bin for ventilation and air flow. It is a must for worms to breathe and to break down the contents quickly. Avoid holes that are big enough to aid in worm escape.
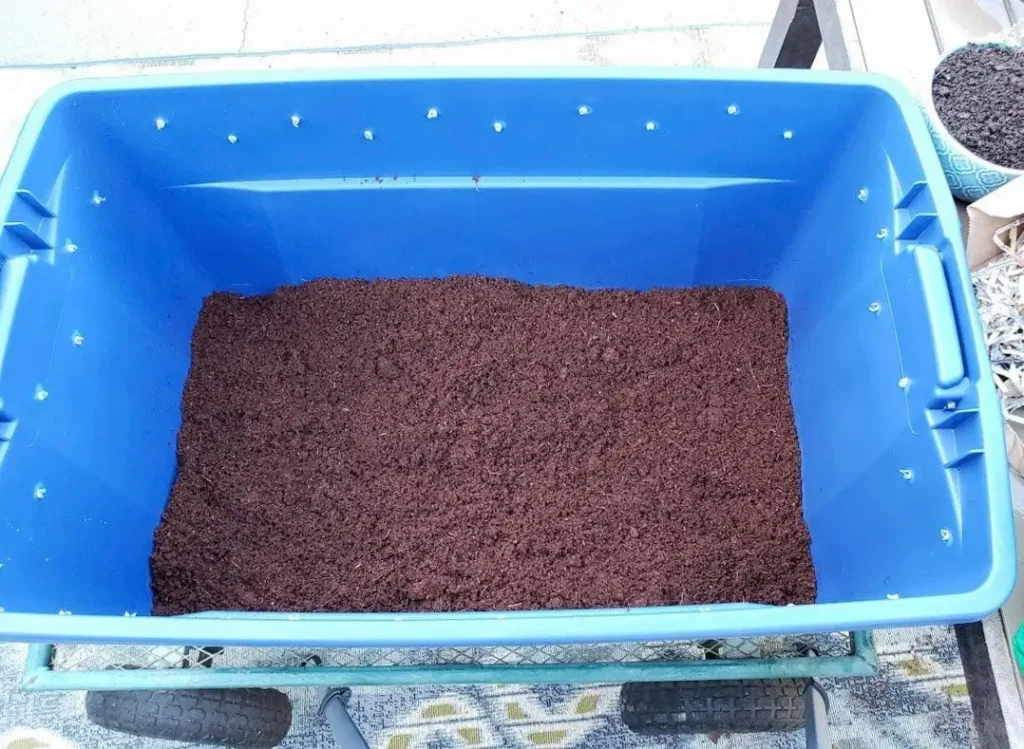
Step 2: Prepare the Worm Bedding
Various materials can be used as bedding in a worm bin. Some great options are shredded newspaper, cardboard, rehydrated coco coir, dry leaves, dry grass clippings, straws, brown paper bags, and manure from herbivore animals.
Bedding gives the worm a home to hide and helps in mechanical digestion. You should use 15 cm of the bedding in the bin. Cardboard can be broken easily and provides a larger surface area for beneficial bacteria. Avoid bleached white paper, colored, shiny material, or peat moss that may cause harm to worms.
Tear newspaper/cardboard into ½ to 1-inch strips. Place the shredded material in a separate container and pour some dechlorinated water to moisten it thoroughly, but squeeze out the extra water.
It should be damp but not dripping with water. Place the strips to the bin to ensure it is fluffy and not compacted for better aeration.
Step 3: Layer the Bedding in the Bin
Layering the bedding with different materials is the best approach in vermicomposting. You should use large and small cardboard pieces along with a few strips of paper towel for the second layer. Different materials break down at different rates.
For example, paper towels break down quickly, then small pieces of cardboard, and lastly, large cardboard strips. Therefore, it increases the composting time in the bin rather than finishing the material all at once.
It is recommended to add some food first, and then introduce the worms. The food particles break down easily, and a microbial environment is established for worms. An apple core or a banana peel will do a good job in the bin.
Optional, but add a handful of aged compost or garden soil to introduce beneficial microbes. Uniformly spread the newspaper strips over the top of all the bedding.
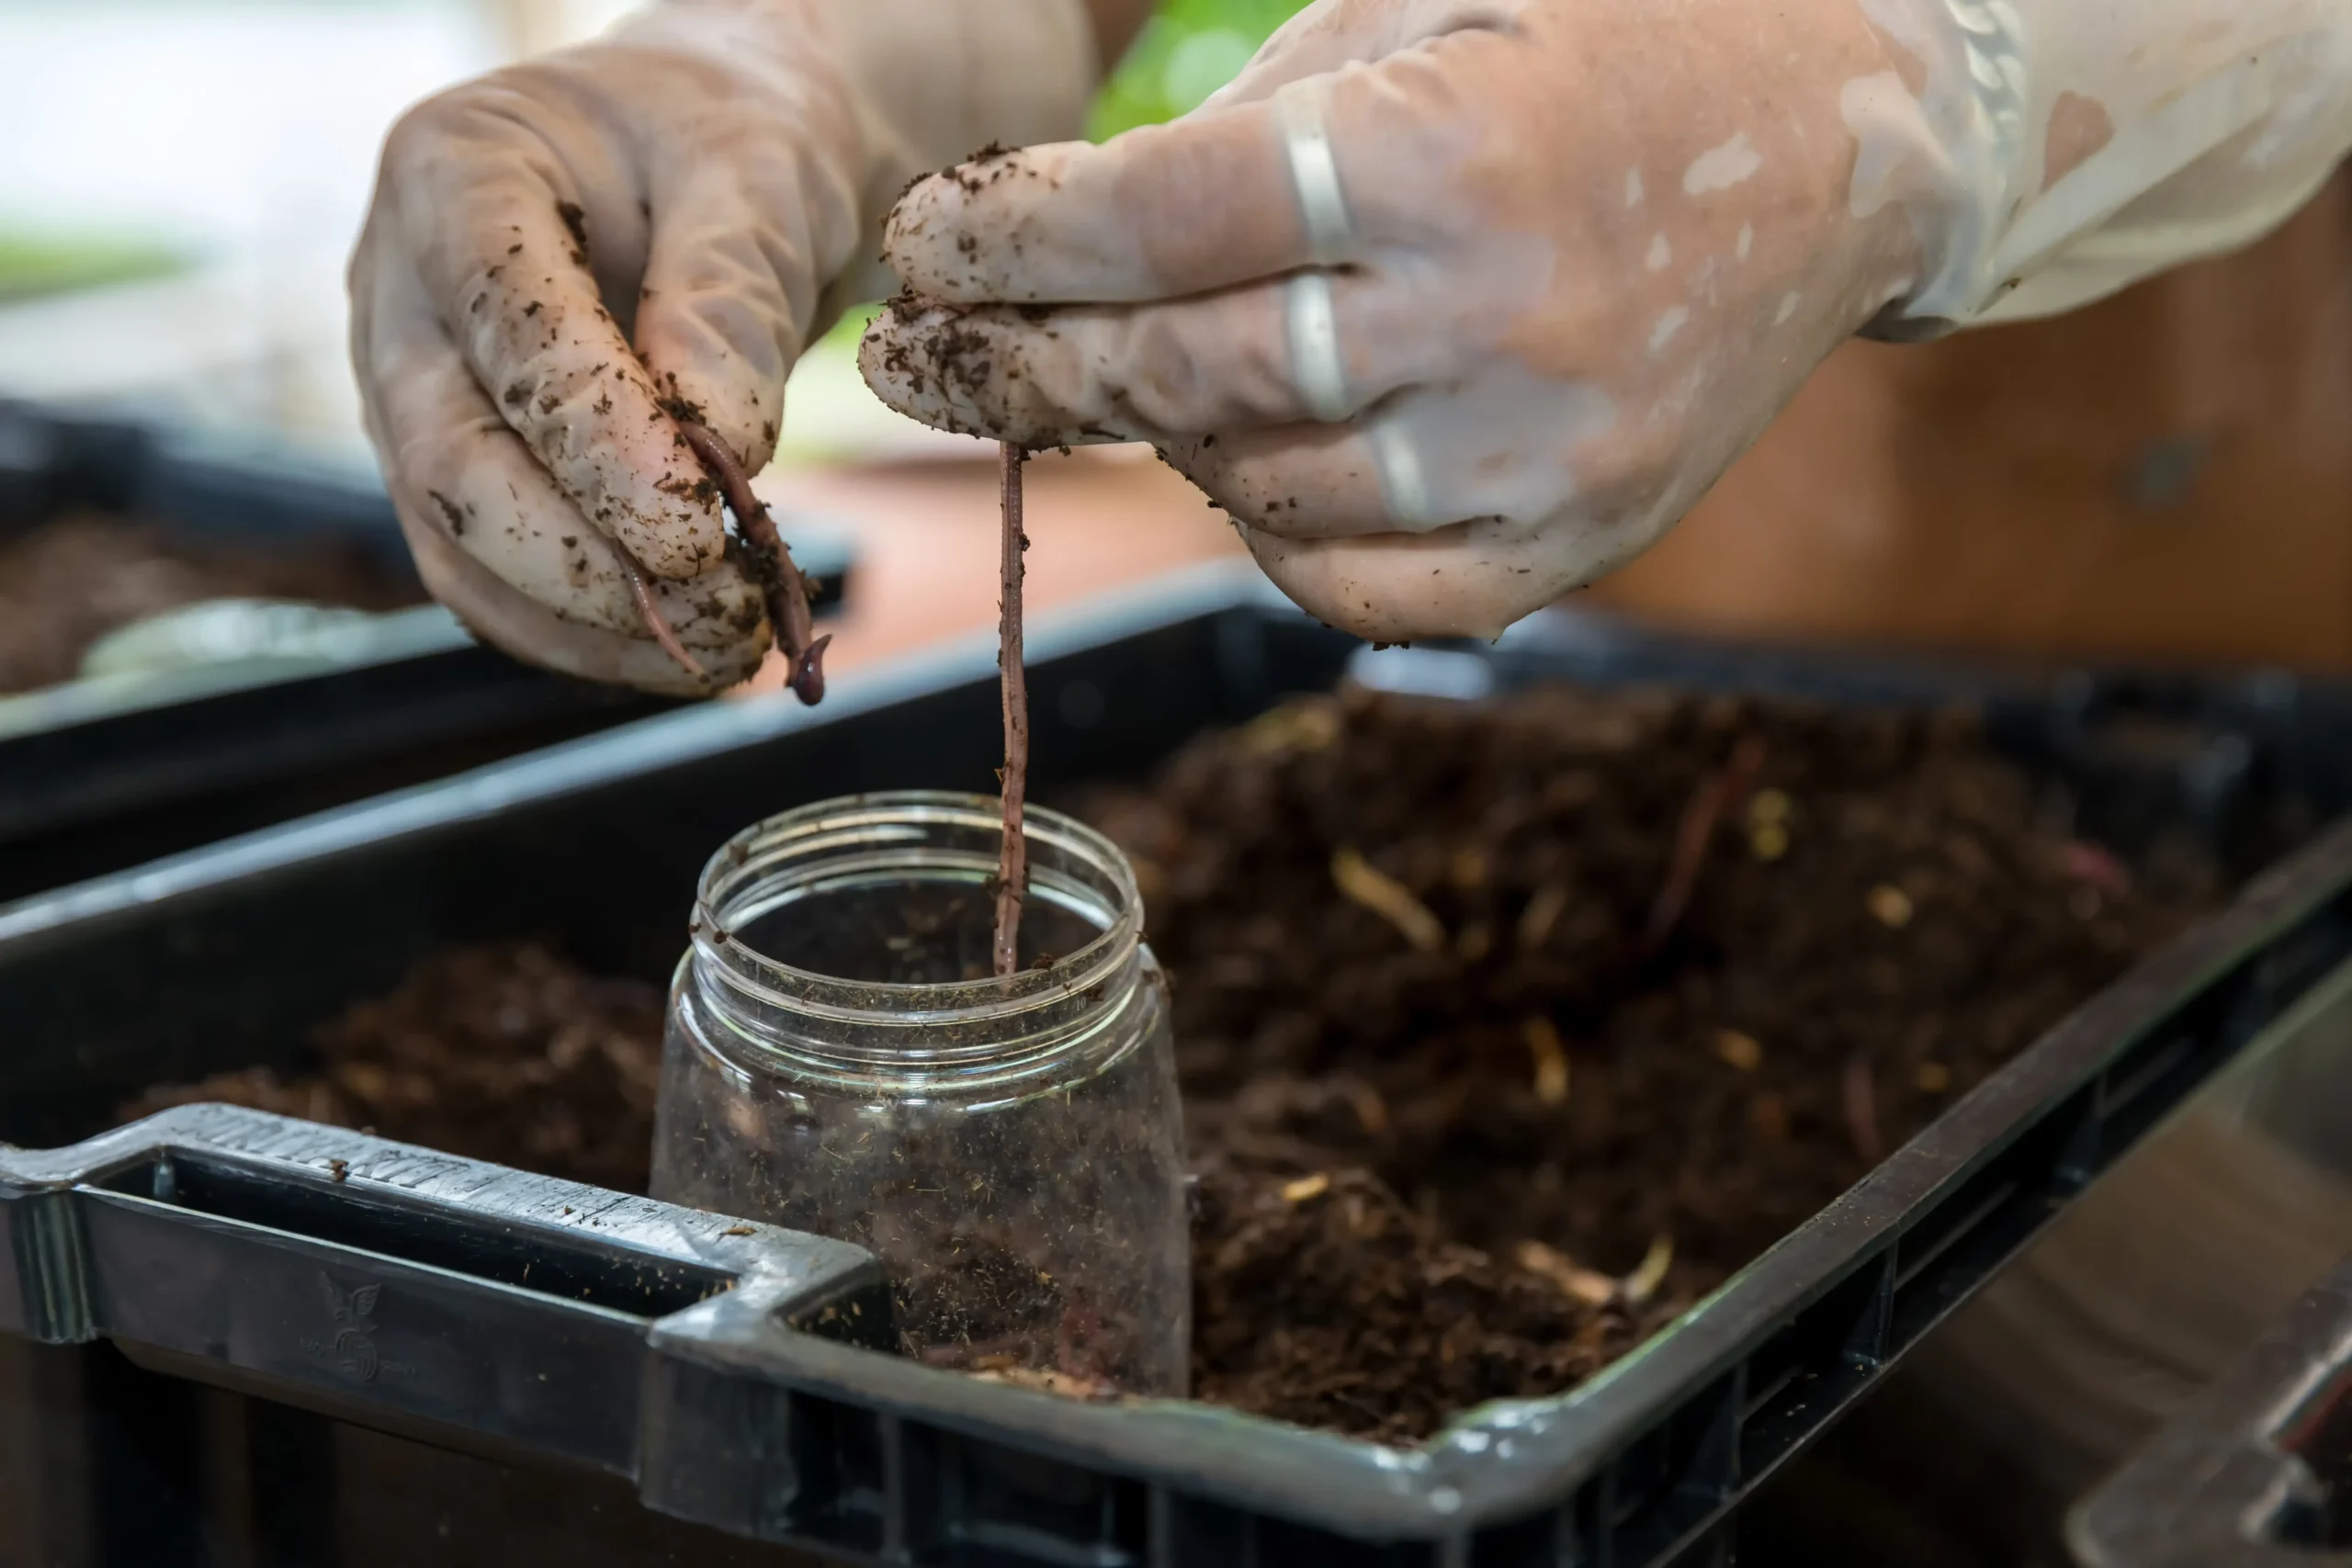
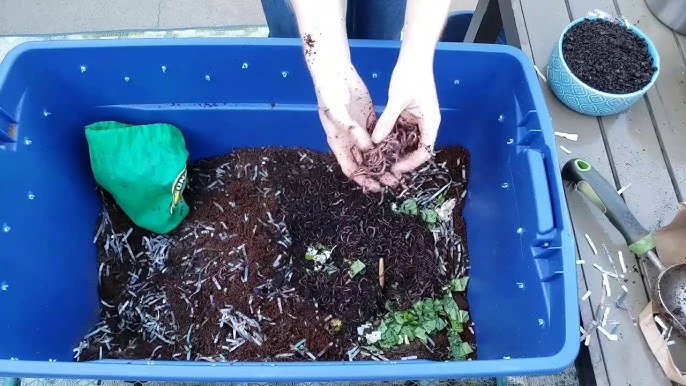
Step 4: Introduce the Worms (Red Wiggler/European Night Crawlers)
Gently place the worms on top of the bedding and relayer it with soil and bedding.
Consider how many worms you’re feeding your axolotl in a day and the worm’s life cycle before establishing a worm bin. Start with a smaller population of worms in the bin. Under optimal conditions, they double in population within 90 days. 1-2 pounds of worms are recommended for a 30-35 gallon bin.
In the wild, worms have access to sand, grit, gravel, and stones along with decaying material. Their bodies have a special structure called a gizzard that holds harder particles and small rocks. They use it to break the food into small pieces.
Cover the worms lightly with a thin layer of bedding (newspaper/soil/cardboard). Add some sand and grit, and cover the worms.
Even if you don’t cover, they’ll burrow down. Leave the bin open to ambient light initially so that worms burrow down. Once you are sure all the worms are settled down in their new home, place the bin in a dark area.
Step 5: Initial Feeding
The fact that worms don’t need food in the first few days is not correct in my opinion. I started with developing a microbial system first in the bin and introduced the worms after that. Initially, start with the food that can be broken down easily, such as grape vine, apple core, and cereal.
However, do not overfeed the worm, and they need some time to adjust to new conditions. The process of decomposing is slow, and they won’t eat much. Therefore, the food may start to rot and smell bad.
However, under optimal conditions, worms can eat their body weight per day. For example, if you put 1 pound of worms in, they’ll eat 1 pound of food daily. As they reproduce and the population increases, they will eat more.
Add a minimal amount of food scraps to one corner of the bin and bury them lightly under the bedding. Do not overfeed your worms, as it will create nitrogen spikes in the bin and acidify the bedding. As a result, worms may try to escape or die.
What to Feed:
- Veggie scraps
- Spent coffee grounds and tea bag in a small quantity
- Tender garden trimming
- crushed eggshells
- fruits (especially soft ones)
- Pulp from juicers
- Leaves (not treated with pesticides)
What to Avoid:
- Citrus (contains limonene that is toxic to worms) fruits, onions, garlic, radish greens, and ginger
- Dairy products, meats
- spicy and greasy food
- Starchy food, i.e, bread, pasta
- Moldy, rotten food
- Processed food
Feeding Schedule and Portion Sizes
- Start with ⅕ to ¼ of the weight of the worm population in the bin. A pound of red wigglers needs 3-4 ounces of food scraps.
- Never add new food until they eat the previously added food, as it will invite unwanted pests and cause odor.
- Don’t bury the food deeply. Red wigglers are surface dwellers. They don’t eat food that is more than 1-2 inches deep in the bin.
- After the first feeding, change the feeding schedule, give ⅓ of their weight. For 1 pound of worm feed, ⅓ of the food scraps, and then increase gradually.
- Note the date and amount of food added for tracking. Worms can finish the food within 24-48 hours. Remove uneaten food after 4-5 days.
- In an established vermicomposter, carefully stir and fluff the bedding before feeding for air flow, and notice the condition of the bin. I prefer giving them food once a week.
Step 6: Find the Right Location for Your Worm Bin
The bin location matters a lot for worm growth and the decomposition of waste. Red wigglers like darkness. So, place the bin in a dark area.
Worms prefer moist environments and temperatures between 59 to 77 °F. Red wigglers are not sensitive to temperature, but if the bedding dries out in hot weather, they may die.
You may notice that under stress conditions, worms clump up together. Otherwise, a happily growing worm is freely moving around the bin.
Ideal locations to place the vermicomposter bin are in the garage, basement, shaded balcony, or under the kitchen sink that allows good ventilation.
- Avoid direct sunlight, extreme heat, or cold places.
- Keep away from radiant heat sources and south-facing walls.
- If you live in an area with cold temperatures in winter, use wool blankets to insulate the worm bin.
- Outdoors: Place the bin in a shade with good air movement to protect from direct sunlight and rain.
Step 7: Maintain Your Bin
Once the worm bin is set up, it requires little maintenance once in a while. Avoid constantly disturbing, but keep a close eye on the worm and bedding health. Monitor the conditions and make changes accordingly.
Moisture management: If it gets too dry or too moist, worms may die. A damp bin attracts pests and is stinky. Keep the bin in a dark, moist, and around 55–77°F (13–25°C).
Moisture in the worm farm depends upon ambient humidity, temperature, type of bedding, and the type of food that you feed to the worms.
A general rule of thumb to check and maintain the moisture is when you squeeze the bedding, it gives a feel of a damp sponge, and 1-2 drops of water should fall off.
If your worm farm gets too wet, remove some of the damp bedding material, retrieve the worms, and replace the material with fresh dry medium.
pH: Worm bin pH is slightly acidic, but if it gets too acidic, introduce crushed eggshells, lime, or rock dust to balance it.
Turn Bedding Occasionally
Stir the bedding and loosen it up weekly. It will prevent anaerobic bacteria from growing at the bottom of the bin. It will also prevent foul smell. Also, you need to add more bedding material, like shredded newspaper or cardboard, occasionally.
After 6-8 weeks, the bed begins to look like coffee grounds. It means the bedding is fully processed, and most of it is a worm casting. You should leave the worms in their excreta, and need a new bin or add fresh bedding material to the surface of the bin. Place some food scraps on top of it, and worms will migrate on the surface.
Watch for Overfeeding, Foul Smells
Overfeeding is the major culprit behind foul smells and excess moisture. Keep a track of your feeding and only add new food when worms eat the previous food. Moreover, it also attracts fruit flies and other pests. Freeze the extra food scraps so you don’t have to waste them.
Ventilation
Ventilation is necessary to balance the moisture in the bin and prevent the issue of mold and bacterial growth. Worms breathe in oxygen and release carbon dioxide through their permeable skin. And that’s why, it is a must to have holes on top and sides of the bin for fresh air.
Troubleshooting Common Worm Bin Issues
Starting a worm bin is an easy task, but it’s hard to maintain, especially for beginners. Some of the common issues while growing worms are given below. Avoid the mistakes, and you can easily grow worms for several years.
1. Foul Odors
A pungent and intense smell indicates an issue with the worm bin. Typically, it happens due to acidic conditions, improper aeration, excessive food, and moisture in the worm bin.
Wrong food choices will worsen this issue. The worms in the compost bin can only digest a few materials at once. Therefore, feeding them with every available leftover is not recommended.
Worm composter should not be treated as a trash bin. Extra food will start to rot and cause oxygen depletion and moisture in the bin.
Also, large-sized food items should be cut into small pieces for better composting, odor reduction and pest prevention. Gently fluff the bedding to introduce fresh air. Check the pH. If it is a little acidic, use some crushed eggshells or garden lime to balance the conditions.
2. Fruit Flies and Other Pests
Another issue that comes with overfeeding your worms is fruit flies and pests such as white mites. Mites like moist soil and a starchy environment, while Fruit flies only come when there is something to eat in the bin. Also, it indicates that there is too much nitrogen-based material in the worm bin, such as banana peel, watermelon, etc.
An excellent method of catching mites in the worm bin is to place a slice of cucumber or melon in the worm bin. Mites will cling on it within 24 hours. Dispose of the infested food scraps. Also, change the feeding schedule of the worm. Giving them less food but frequently will also help to prevent the issue.
3. Slow Worm Reproduction
It may be due to temperature, food supply, moisture, and bin size or space. In winter, worms tend to slow down due to temperature shifts. It is normal, but I recommend insulating your compost bin. Similarly, in summer, during scorching hot weather, place the worm bin in shade. Too much moisture can create an anaerobic environment that can reduce reproduction.
Another potential reason behind slow reproduction is limited space. Worms need space to move, mate, and to lay cocoons. Overcrowded bins naturally control the population of worms.
4. Mold Growth
Limited air flow, high moisture, and rotten food lead to moldy bins. Mold on a small scale is okay, but there is something wrong in the bin if you observe it at a larger scale.
Elevate your bin slightly and place it on a stand to improve aeration underneath. Remove the affected areas to prevent further spreading. Also, adjust the moisture content in the bin by mixing dry leaves, newspaper, or cardboard strips.
5. Worm Escaping
Worm escaping is a common issue when you initially put them in a worm bin. Once the bin is established, it is rare for them to escape.
However, if your worms are trying to escape from the bin, it means the conditions (temperature, moisture, bedding) are not ideal for them. Check the placement of the worm bin to keep it away from vibrations, foot traffic (dryers and washers).
How to Harvest Worms for Your Axolotl?
It typically takes 2-3 months for a worm farm to establish fully. A worm bin ready to harvest shows signs like:
- Worm casting is dark brown in color, has a uniform texture, and an earthy smell, which indicates the vermicompost is ready to harvest. It is also known as black gold, which is an excellent fertilizer for the plants. Uniform texture of the vermicompost means there are no uneaten food particles.
- Active and Happy Worms: If you observe the worms are feeding and moving actively, then take it as a good indicator.
- Worm Population Increase and Cocoons: Cocoons are the egg cases of worms, yellowish in color. Their presence indicates that worms are reproducing and growing in population.
Feeding Worms to Axolotls: Portion Sizes and Frequency
Axolotl food size should be smaller than the size of their head. You should adjust the size to match their ability to swallow. Also, cut the worms into pieces for small axolotls.
- Hatchlings: Require more food than adults and should be fed three times a day. Give them pieces of microworms, baby brine shrimp, or bloodworms.
- Baby Axolotl: Should be fed with brine shrimp, bloodworms or blackworms, daphnia 2-3 times daily.
- Juvenile Axolotl: Are 2-11 inches in size and can enjoy multiple food options such as earthworms, pellets, krill, or Repashy Pie.
- Adult Axolotl: Should be fed 2-3 times weekly. Offer them live food such as earthworms, red wigglers, and raw shrimp.
Use tongs, long tweezers, or hand-feeding the worms directly to axolotls. Worms, especially Red wigglers, produce a slimy coat as a defence mechanism. This makes them bad in taste, and your axolotl may refuse to eat.
I recommend blanching the worms before feeding. Briefly dip the worm in hot water, then immediately transfer to iced cold water.
Also:
- Start Small and Simple: Begin with a smaller vermicomposter and a moderate amount of worms to gain experience before upgrading to a larger setup.
- Gradual Feeding: Don’t overfeed worms initially. Start with small amounts of food scraps (half of the worm’s body weight) and gradually increase as the worm population grows.
- Location Matters: Position the worm bin in a location with a stable temperature, away from direct sunlight, heat sources, and extreme temperature fluctuations. Also, maintain good aeration and pH for the prevention of odor and pests.
- Observe and Adjust: Regularly check the worm bin’s moisture, temperature, and worm activity. Making adjustments according to observations will help to maintain a healthy environment.
FAQs
What Do Worms Hate The Most?
Worms hate direct sunlight, drenched bedding, and citrus fruits. Worms breathe through their skin. Therefore, they are sensitive to certain foods that irritate their skin, such as salty, acidic, and spicy foods.
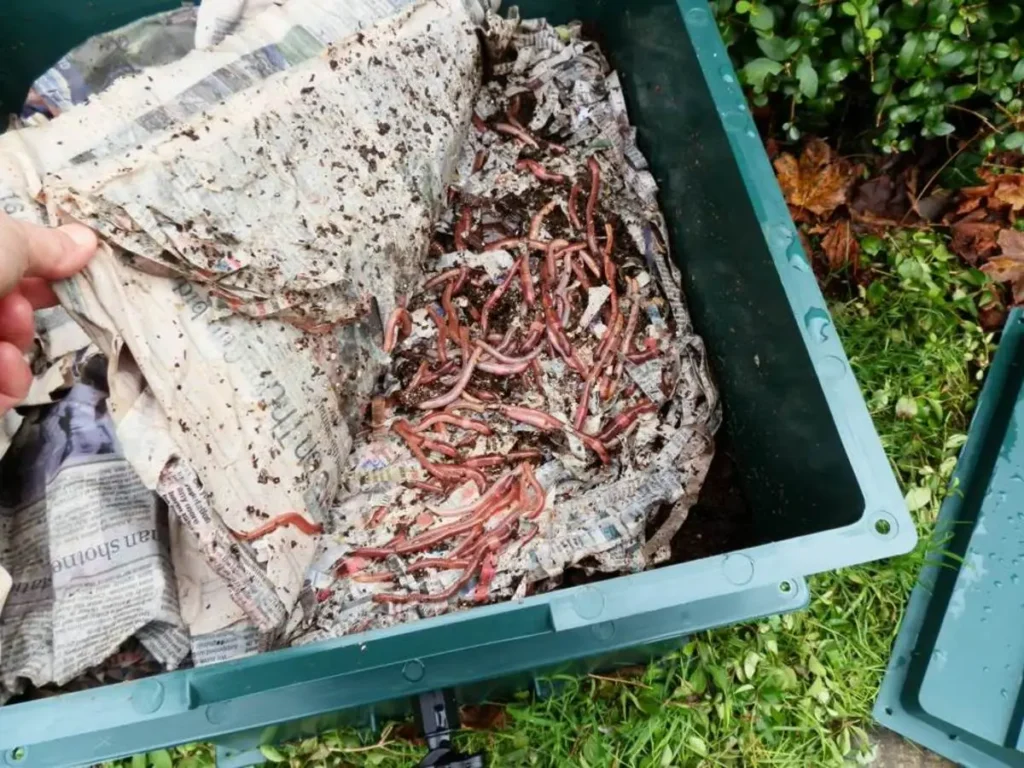
Is A Newspaper Safe For Worms?
Yes, newspapers are safe for worm bedding. Worms such as red wigglers can consume paper products such as newspapers and cardboard. These materials are considered best for vermicomposting. Newspapers use water-based inks, which are safe for the worms. However, avoid bleached paper, colored, or glossy papers.
Should I Water My Worm Bin?
Water in the bin depends on the type of food you put in it. If the bedding looks dry, add more soaked newspaper strips or spray some water 1-2 times per week. However, avoid pouring water into the bin. Outdoor bins exposed to wind and sunlight need more misting than indoor bins.
Final Thoughts
Vermicomposting is a great way to deal with food waste sustainably. Setting up the first worm bin can be overwhelming, and mistakes are expected.
But freshly homegrown worms are free from harmful substances and healthy for the axolotl. Follow my tips to avoid serious issues and have a successful worm farm for your axolotl.
Did I miss anything? Let me know in the comments!
Also check out:
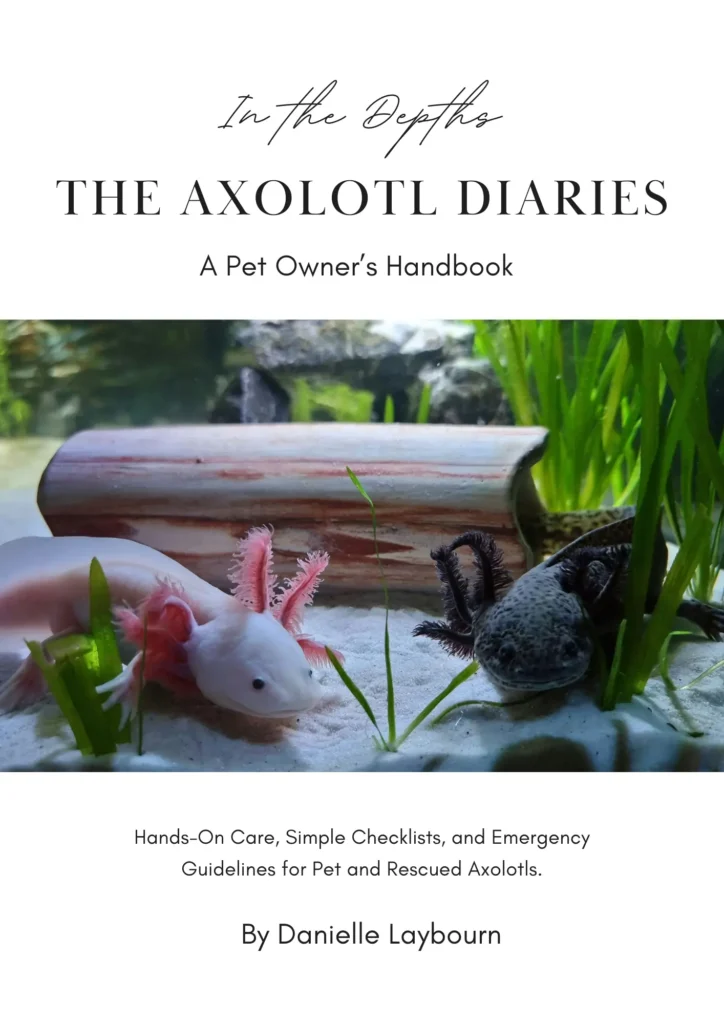
A clear, step-by-step handbook (50+ pages) about axolotl care that covers basics, safe tank requirements, cycling, feeding, common health issues, and more.
Rescue-informed and vet-aware. For anyone who wants to raise a healthy, happy axolotl.
Find everything in plain language, backed by real experience.
Grab printable cheatsheets, practical tips, and easy troubleshooting guide inside!
Price: $14.99